I am linking up with Homemaking Link Up at
Raising Homemakers.
And...
It's A Very Cherry World
for Rednesday!
Today we're making our own homemade butter.
First did you notice the sweet Tiroler webkunst Folksy embroidered table doily made in Austria?
And it is RED! It is so sweet!
I just had to share.
For the Homemade Butter You will need:
2 quart jar, heavy whipping cream,
1 marble, strainer,bowl, measuring cup,
wooden spoon, a butter mold or serving dish.

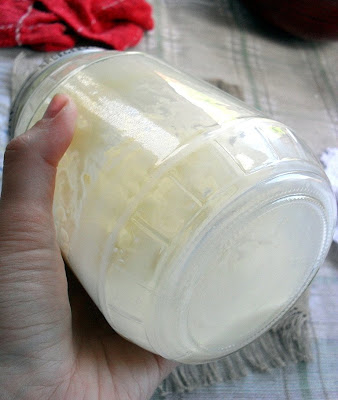
Chill jar and marble in refrigerator for at least 1 hour to help butter form quickly. Once chilled pour 2 cups heavy whipping cream into jar, drop in marble and fasten lid tight. Shake the jar. At first you will hear the marble moving. After about 15 minutes, the cream will get so thick that you won't hear or feel the marble. The sides of the jar will be coated with thick cream. Continue shaking the jar for another 15- 30 minutes, butter will begin to form. First you will hear the marble moving around again, then the coating will disappear from the sides of the jar and you will see lumps of butter in milky liquid. This liquid is Buttermilk and can be used in another recipe using buttermilk...Perhaps buttermilk biscuits for the butter!

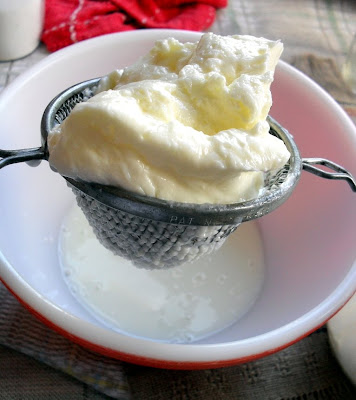
Open the jar and pour the butter and the buttermilk into a strainer.
The buttermilk will flow into the bowl, and the butter will stay in the strainer.
Pour the buttermilk from the bowl into a covered container and store it in
the refrigerator. You can even drink the buttermilk.
Now, rinse the bowl well to remove all the buttermilk.

The buttermilk will flow into the bowl, and the butter will stay in the strainer.
Pour the buttermilk from the bowl into a covered container and store it in
the refrigerator. You can even drink the buttermilk.
Now, rinse the bowl well to remove all the buttermilk.

Turn the butter out of the strainer and into the bowl.
Cover the butter with cold water and pour the water off the strainer.
Do not save the milky water substance.
Keep washing the butter in this manner until the
water you pour off is clear. You are washing out the buttermilk.
Buttermilk that is not washed out will turn your butter sour.
Use a clean wooden spoon to stir and press the butter against the side of the bowl.
Continue pressing the butter against the side
of the bowl to work out any liquid that is left in the butter.
Pour it off.
If you like your butter slightly salted, add a pinch of salt and stir it in.
Press butter into a dish or a butter mold.
Chill it in the refrigerator for an hour before serving...


Press butter into a dish or a butter mold.
Chill it in the refrigerator for an hour before serving...


We used it on our morning waffles...
It was wonderfully natural!
Enjoy !!!
It was wonderfully natural!
Enjoy !!!


I enjoyed your butter tutorial !
ReplyDeleteOur pioneer grandmothers must have had strong arms churning butter !
I am not into making butter anymore. I had to churn it the hard way long enough. I reallu do like the place mat.
ReplyDeleteYou are amazing! Is there nothing you can't do? Incredible crafter, and now butter maker too! I would love to try this, because for some reason the butter that I buy in the store just doesn't taste like the butter I remember from the past. It's just too artificial tasting. LOVE the doily!
ReplyDeleteHappy REDnesday!
Carol
All that work, really makes you appreciate that stick of butter from the store :-) Chloe wants a butter churner soo bad. I bet after 10 minutes, it will lose its appeal xoxo Clarice
ReplyDeleteI'll be trying this at some point. I think my daughters will get a kick out of it! Thanks for the idea.
ReplyDeleteAbout how much butter does this recipe yield?
ReplyDeleteThanks!