Showing posts with label baking. Show all posts

Sunday, August 2, 2015

Vintage Raspberry Jello Poke Cake


Here is a favorite Summer cake I grew up on. A vintage recipe with a little extra yum...The Raspberry Jello Poke Cake. Many recipes for a poke cake is pretty plain. Usually made with the jello and cake with some whipped cream on top. When I was a kid...We put pudding and bananas topped with whipped cream. It adds so much more flavor to it...And it is refreshing if you add berries on top.


Ingredients

1 box yellow cake mix ( make cake as directed on box)
1 box (4 serving) raspberry flavored jello
1 cup boiling water
1/2 cup cold water
1 box instant vanilla or banana flavored pudding ( make according to box directions)
1 container (8oz.) thawed whipping cream
fresh raspberries
2 bananas

Directions

Heat oven to 350°F (325°F for dark or nonstick pan). Make and bake cake as directed on box for 13x9-inch pan. Cool completely in pan, about 1 hour. Pierce cooled cake all over with fork or chop stick. While cake is cooling, In small bowl, stir gelatin and boiling water until smooth; stir in cold water. let cool in fridge for about 15 minutes. Pour over cake. Run knife around sides of pan to loosen cake. Refrigerate 2 hours. After two hours or before serving: Make pudding, let set for 5 minutes in fridge, then slather all over top of cake. Cut 1/4 inch banana pieces all over the top of pudding and cake then frost with whipped topping; garnish with raspberries. Store covered in refrigerator.

Friday, July 24, 2015

Proverbs 31 Girls~ Summer Cooking Camp

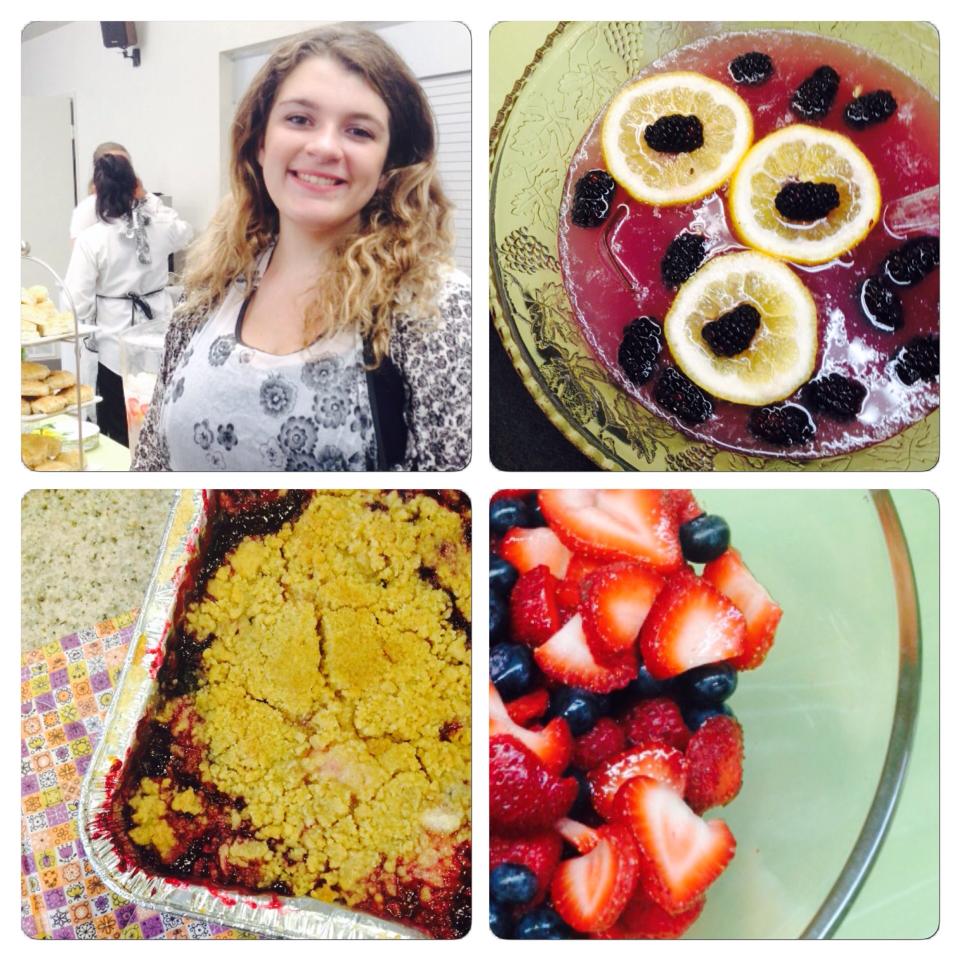
What a blessing to have been a part of a Proverbs 31 Cooking Camp this last week for Summer break. My girl had a great time at this camp...Learning how to cook and bake some goodies, and left with some hndy tips, tricks and knowledge in the kitchen. It was pretty extensive. Each day they worked on a bible verse, had a time of prayer and devotional time on the Proverbs 31 woman. She gleaned so much! Every day they made something new. The first day they made Shepherd's Pie and homemade rolls and brought it home for our dinner. The second day they made a lovely wild berry crumble which we enjoyed that evening paired with vanilla ice cream. Wednesday they made fruit tarts and toffee. Thursday they made quiche and Friday the girls presented and hosted a lovely brunch for the mother's and ladies. It was delightful! They really shined, making delicious food as the presentation was also beautiful. 


The teachers were wonderful too! 
They went all out and dedicated hours of work to 
these young ladies and it all paid off! 

Saturday, April 19, 2014

Homemade Lära Bars


A couple posts down I shared our new adventure. Changing our lifestyle and the way we eat. So far it is going great. However, Easter is just a day away. I got to thinking. Well, if we are cutting out all the junk and candy stuff...What could I do for Freckle's Easter basket this year. Okay time to get creative. We are not eating bread either so I had to come up with something healthy, whole, with no added refined sugars and wasn't a grain. I found just what I was looking for. Have you ever had Lara Bars? They are pretty darn good. I got the recipe on Pinterest. 


It is quite simple. 
Yet you will need a food processor for this.
Look at all the healthy yummies that go into this thing. Oh and no baking!!!! It's so simple...You just combine all the ingredients together, put it in a pan and freeze for 20 minutes, cut them into bars and enjoy. 


Recipe for Homemade Lära Bars (Mixed Berry):

  • 1 cup almonds
  • 1/2 cup pecans
  • 12 Medjool dates
  • 1 cup dried berries and / or cherries
  • 1/2 cup shredded coconut
  • 1/4 teaspoon sea salt
  • 1 Tablespoon melted coconut oil

Directions for Homemade Lära Bars:

  1. Line an 8″ x 8″ baking dish with plastic wrap or wax paper. Set aside.
  2. Add the nuts to the food processor and pulse down until they become small, crumbly bits. Don’t let it go too long or it will become nut butter—er, not that there’s anything wrong with that but it won’t help this recipe. Some pieces may be a bit bigger and some might be tiny. That’s okay. Pour the nuts in a large bowl.
  3. Now, pit the dates and put them in the food processor with the dried fruit, shredded coconut oil and sea salt. Pulse until it comes together in a ball.
  4. Now, with clean hands: add the dried fruit to the nuts and combine both together. You’ll have to knead pretty well but keep at it.
  5. Once all the nuts are blended in, you’ll take the lump of deliciousness and put it in the baking dish. Press the mixture into the dish until it’s packed down and smooth.
  6. Freeze for 20 minutes until firm.
  7. Turn out the mixture onto a cutting board and chop into pieces as big or small as you’d like. I usually make 12 bars from one dish.
  8. I individually wrap them. They can be frozen for a couple months if packed to withstand freezer burn. If not, store in the fridge for short term use


After I cut them up, I wrapped each bar and threw them in the fridge.
 Of course I will fill Freckles basket with a couple of them as well!


I also decided to dehydrate some strawberry, banana and apple chips for some
 filling in the basket and I made some apple fruit leather.
Perfect, whole and healthy, good for snacks for an Easter basket.


No chocolate bunnies here this year!
Wishing you all a blessed Easter.
Enjoy!!!!

Sunday, October 6, 2013

Blondies or Brownies?


Freckles and I did a little baking this weekend for our Bible Study. Freckles loves to bake, so we decided to make some brownies and blondies from scratch. Which ones do you like?
We actually like both. Different flavors, with the same sort of texture...Yum yummy.
 
We couldn't leave without sharing the recipes, Enjoy...

~Brownies~
Ingredients
  • 1 Stick Butter, melted
  • 1 cup sugar
  • 1 tsp vanilla extract
  • ½ cup Self Rising Flour (if you use All Purpose, add ¼ tsp Baking Soda and ¼ tsp Salt)
  • 2 eggs
  • ⅓ cup Cocoa Powder (I use Hershey’s)
  • I have a nut allergy, so I don’t include nuts, but if you prefer you can add ½ cup
Instructions
  1. Pre-heat oven to 350.
  2. Spray 9 inch baking pan with non-stick cooking spray.
  3. Melt butter on stove top
  4. Mix melted butter, sugar, and vanilla extract in a small bowl
  5. Add eggs to mixture, stirring wel
  6. Mix dry ingredients in a medium bowl (flour and cocoa powder)
  7. Add wet mixture to the dry ingredients bowl until well blended
  8. Pour into baking dish
  9. Bake 20 minutes
 
~Blondies~
ingredients:
1/4 cup butter, melted
1 cup brown sugar
1 egg
3/4 cup flour
1/2 tsp salt
1 tsp baking powder
1/2 tsp vanilla
1/2 cup chopped walnuts (optional)
 
preheat oven to 350 degrees.
combine melted butter and brown sugar. stir until well blended.
add egg, mix well, stir in dry ingredients, add vanilla, mix well.
spread in buttered 8"x8" pan and bake for 25 minutes.  
 
Here's to a great week ahead.

Thursday, September 26, 2013

Autumn Flavors...Pumpkin Chocolate Chip Cookies


Hello Autumn...
Now that Autumn is upon us we also enter the flu and cold season and cooler weather. This week, I have been quite under the weather with the flu and fever. I am still fighting the bug as I write...But wanted to pop in and share a little recipe for a nice little sweet treat to ring in the new season. My dear Freckles wanted to do a little baking, requesting her favorite cookie....This is a recipe we have had around for years. A favorite of my family indeed. A delectable, moist cookie with delightful flavor, reminiscent to the Autumn season.
I bet you can't eat just one of these yummy, muffin like cookies. She prepared the batter and got to baking. The treat was sure to lift my spirits with the wonderful flavors of pumpkin and chocolate. MMMMMM...It was perfect.


I leave you with the ingredients below. Note* mix all the wet ingredients with the sugar first...Then add the dry ingredients. Mix well...It gets thick, so a lot of the mixing will be by hand...and there is a ton of batter so be prepared to bake dozens. Drop by heaping tablespoons about an inch apart on a cookie sheet...They will bake like little muffin delights.
 In my oven, it only took 13 minutes...
so watch your time.
The cookies should be golden brown.

Enjoy dear friends.
And do take care as the weather changes.

Friday, August 30, 2013

Baking Peanut Butter Cookies


There is definitely one thing Freckles loves to do and that is baking. As a part of homemaking/kitchen skills, she is learning how to cook and bake different foods. Her favorite is cookies. After dinner, our sweet tooth's were getting the better of us...Freckles suggested baking peanut butter cookies. One thing...We didn't have all the ingredients for a typical peanut butter cookie...So we searched for one with minimal ingredients...and found one that was so easy....It's going to knock your socks off.


We have been dabbling a bit in a couple of our vintage cookbooks for recipes, which makes it fun. Things that most Gramma's would have baked in the 1930's~1940's. A good Peanut Butter Cookie would be found in a cookbook back in those days. So, I decided this would also be a great project, since we have been studying the 1940's.


And of course we used our vintage aprons and Pyrex...
We felt as if we were back in time, in a Gramma's kitchen.


The house smelled of comfort....The cookies were beautiful.
 

And they tasted delightful.
It was the perfect opportunity for a wonderful life lesson and bonding
 time between mother and daughter.
These are moments I know we will cherish together.
I love those moments.

Saturday, August 17, 2013

S'mores...Italian Style


one of our favorite pastimes is making s'mores over an open fire while camping, at the beach or just because. it's a hot, sticky and sometimes, burned mess. yet, that doesn't detour us from enjoying the yummy, ooey gooey goodness of marshmallow, chocolate and graham cracker. okay, so i'm not a huge fan of burning, smokey smoke from a fire...so what to do if you don't like the smoke, or perhaps you don't have a fire pit, but you love making s'mores...or maybe you don't like molting hot marshmallow scorching your tongue?

we have a wonderful idea...which we found ingredients for at World Market.  a lovely package of  Italian Pizzelle cookies, a jar of Italian Nutella and a jar of marshmallow fluff....oh my.... it's easy to make...a little messy, but easy. just spread the fluff and Nutella on one side of
each Pizzelle and sandwich together. then enjoy...


Mama Mia....they are delizioso...
Enjoy......
this is also the last installment for our Summertime vintage 1940's posts. but,
will be doing more posts and projects for the 1940's this Fall. Stay tuned.

Fun fact:

              IN THE 1940s

After World War II, America was on the go. More and more families bought cars and began taking family vacations to campgrounds and national parks. Making S'mores over campfires became increasingly popular during this decade.