Showing posts with label recipes. Show all posts

Saturday, September 5, 2015

Summertime Jam Series~ Honey Vanilla Bean Bourbon Basil Peach Jam


This ends the Summertime Jam Series/ recipes for Summer 2015. I hope you enjoyed following along making jam with me this Summer. I will return next Summer with some more delicious jam recipes for you to enjoy! 


This peach jam is scented with the luxurious flavors of honey and vanilla bean & vanilla bourbon for an elegant delicious treat. It is made without pectin to allow for a lower-sugar recipe.
Serves:: 6-8 jars
Ingredients:
  • 2 Tbsp. apple cider vinegar
  • 4 lbs fresh summer peaches
  • ⅛ C. lemon juice
  • 2 C. granulated sugar
  • ½ C. honey
  • 1 vanilla bean or 1½ tsp. pure vanilla extract
  • 1 tsp Vanilla Bourbon from Trader Joe's
  • 2 finely chopped fresh Basil leaves
Directions:
  1. To peel peaches, blanch them in a pot of boiling water for about 30 seconds each. Remove from water and use your fingers to easily pull away the peels. Then place peeled peaches into a large bowl of water along with the 2 Tbsp apple cider vinegar while peeling remaining fruit.
  2. Place 6-8 clean 8 oz. mason jars in a large pot of water, then bring water to a simmer to keep jars warm while you make the jam. In another small pot, place flat jar lids in simmering water as well (no need to boil rings.)
  3. While jars and lids are simmering, finely chop the fruit and discard pits. (If you prefer a smoother texture, use a potato masher after chopping.) Add the peaches, vanilla bourbon and lemon juice to a large pot.
  4. Stir in the sugar, honey and basil, then bring fruit mixture to a boil over medium heat. Continue to boil, stirring frequently, about 25-30 minutes until jam has thickened. You can test the thickness by dropping a little bit of jam onto a cold plate.
  5. Carefully lift a warm jar from the simmering water, pouring water out of the jar as you lift. Ladle jam into the sterilized jar, leaving about ¼ inch of head space at the top.
  6. Wipe around the rim of the jar to clean off any jam has spilled over the sides. (Note: at this time, you can stir in any additional herbs or spices for extra flavoring.)
  7. Place a lid onto the jar and gently screw it on with a metal band (Being careful not to over-tighten at this stage.)
  8. Repeat this process with all remaining jars. If you end up with extra jam, you can always store it in the refrigerator to be eaten in the next few months. The next step is only necessary for pantry-storage.
  9. Return filled/lidded jars to the pot of water and make sure they are covered by a few inches of water. Bring water to a heavy boil, place a lid on the pot, and process jars in boiling water bath for 10-12 minutes.
  10. When 10-12 minutes are up, remove the lid from the pot and turn off the heat, but allow jars to sit undisturbed for 5 minutes so that the pressure inside can equalize.
  11. After 5 minutes, carefully lift out the jars and place them on a towel in a place where the jars can sit undisturbed for the next 24 hrs.
  12. You will hear popping as the jars seal over the next few minutes or hours.
  13. After 24 hours, remove the screw bands from the jars and check the seals by pressing your finger in the center of the lids. There should be no give whatsoever. (If any jars are not sealed properly, store those in the fridge.)
  14. Then screw on the lid bands 


*********
Enjoy!!!

Friday, July 10, 2015

Pannkakor Pancakes (Swedish Pancakes)


For as long as I can remember, my Gramma would make Swedish pancakes on the occasions that I was with her. She knew I loved pancakes....One of my all time favorite breakfast staples. I love pancakes of all kinds. After getting married over 20 years ago, I kept the tradition of making Swedish pancakes for my family. And every time I dig out the mixing bowl, cook them up and spread jam all over it....It brings me back to those memories of my childhood and Gramma making them for me. 
Gramma never had a recipe written down for them since she was the kind of cook who would just throw everything together and it was great! She had sort of told me how to make them many years ago...But with time I came up with my own recipe.

 About a year or so ago we gave up on milk in our house, and started using almond and coconut milk, hence it is better for you and has more calcium in it then cow milk. On top of that, Freckles cannot handle milk any longer so we took it out. The recipe I came up with is very easy and very basic..If you wish to use cow milk you can...It won't make a huge difference. We will also use the unsweetened vanilla almond milk which really gives the pancake a nice flavor. The recipe makes about 6 pancakes, so if you want more than that, you can double the recipe with no problem!!!!


~Pannkakor Pancakes~
*****
1 Cup sifted all purpose flour in mixing bowl
1 1/2 C almond milk
1 whole egg
1 egg yolk separated
dash salt
1 Tbl melted butter

Whisk all ingredients in a
 bowl until well mixed.


Use a non-stick pan to keep things easy, but butter the pan before you cook each pancake. It helps the pancakes to brown and it just plain tastes better. I keep a chunk of butter in its original paper and spread a bit around between each pancake. It takes a while to cook all the pancakes, keep an oven-safe plate in a 200-degree oven and put the pancakes in there until all they are all done. They taste just the same whether hot off the pan or warmed in the oven, and then everyone can eat at once. I pour about 1/2 cup batter ( yes batter will seem watery) I spread it all over the bottom of the pan by holding the handle of the pan and pouring the batter with my other hand all at once, with some wrist turning of the pan, 
the batter will make a nice layer on the bottom of the whole pan.
....And now for the flip. This is where I had trouble the first time I ever made them. If you try to flip them too early, they are nearly impossible to flip over. You need to wait until the top looks dry. There will be some bubbling, and the edges look like they might be browning. First flip over one little edge to see if the pancakes are browning on the underside. If it is, you’re ready to go. Tuck your spatula under the pancake, then FLIP over flat on the other side! Cook for just about 1 minute then place on your warming plate in the oven.
One more quick note regarding the heat of the pan. You’ll mostly likely need to adjust the temperature while you’re cooking, but generally the pan will be medium heat, give or take depending on your stove. You want it hot enough that they brown but not so hot that you’re going to burn them. You’ll figure it out, I promise. If you have any problems. There are videos on You Tube that will show you the technique.


We serve our Swedish pancakes with my homemade jams. All flavors of jam are perfect for this pancake. After spreading the jam on one side all over the pancake, you roll them up. You can dust a bit of powdered sugar on top with a touch of whipped cream if you want..We usually have ours with just the jam since it is quite sweet as is. Our favorite jam right now is the Blueberry Basil Jam I recently made. If you would like to try making it...


I will forever make these pancakes and every time I do, 
I think of my Gramma. Enjoy!!!

Thursday, June 25, 2015

Country Girl Dilly Dill Pickles & Yo Yo Show Ribbon Craft


This Summer I have been spending some of my days making jams.... I decided to take a jam break for an evening of canning some dill pickles. So easy, so good and fun! I bought a bunch of little cucumbers and cut slices and chips from my bushel.


Country Girl Dilly Pickles
Bring to a boil: 3 Cups sugar, 2 Tablespoons salt, 2 Cups pure apple cider vinegar, 2 Cups water.
Place in each pint jar (about 4 pint jars): sliced cucumbers
1 whole garlic clove, 1 fresh dill sprig
Pour liquid into sterile jars. Seal. Process in boiling water about 15 minutes in canner.

Allow the pickles to cure for a month before eating! 
********


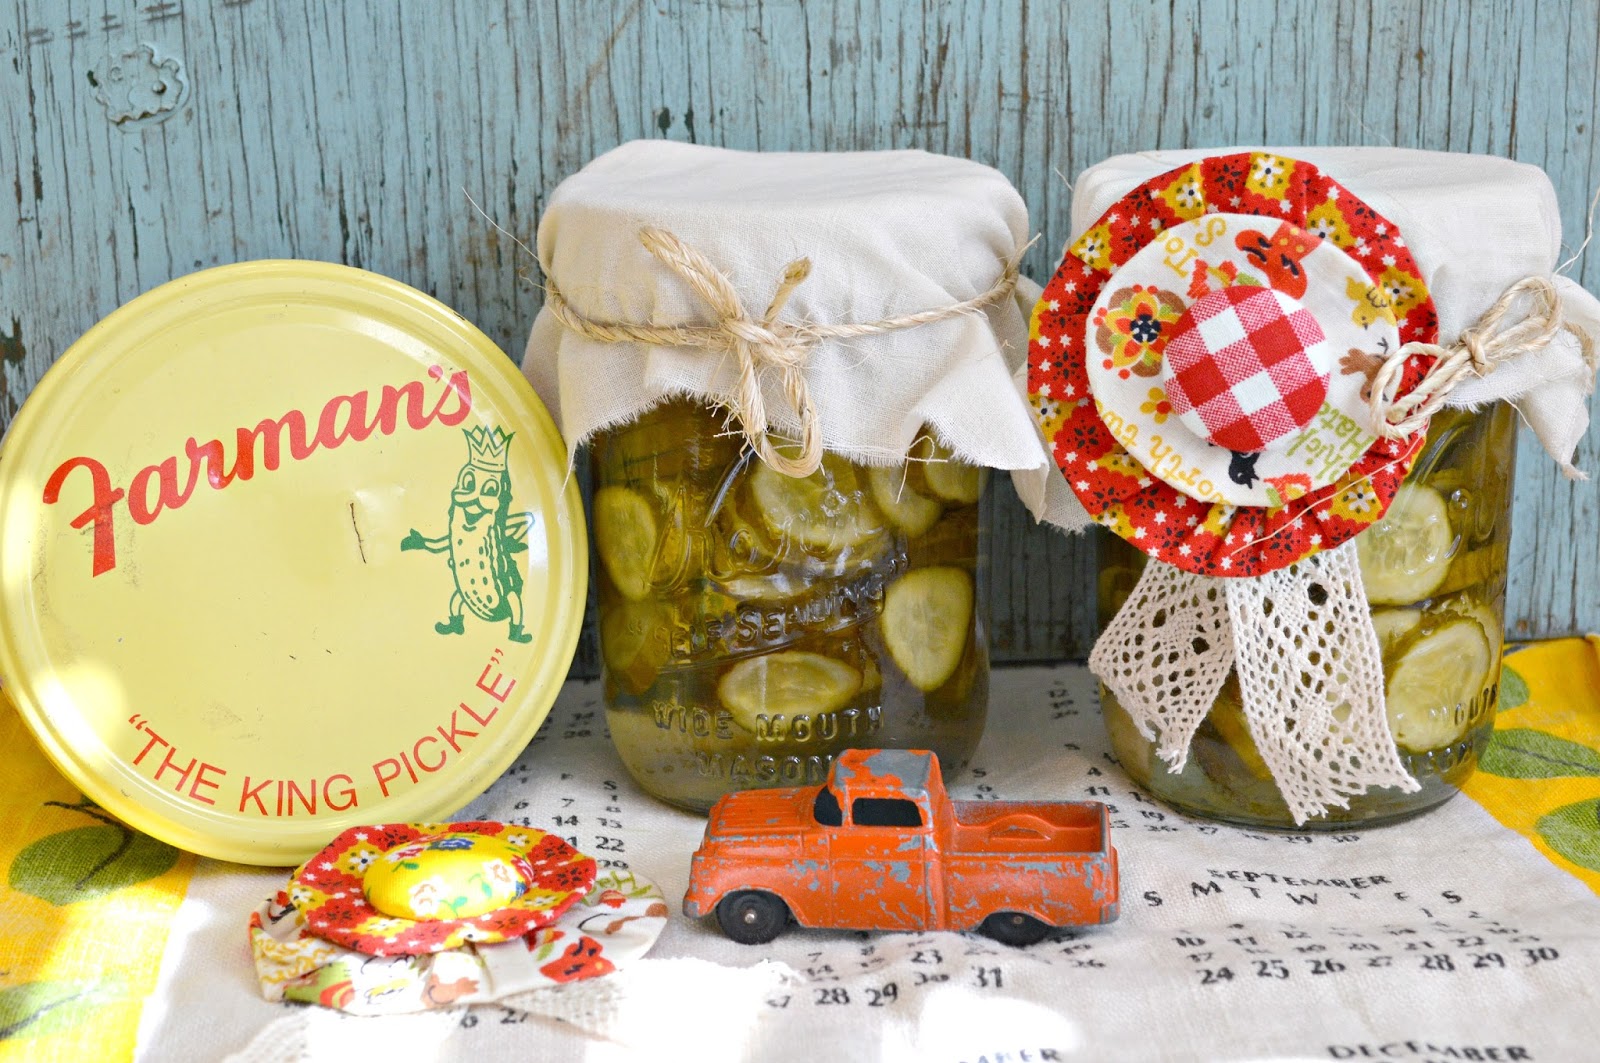
After canning, cooling and allowing time for them to cure. You can eat or give away as gifts. A nice touch to gift giving is decorating your jar of goodness. I used vintage sugar sack linen fabric for the tops tied with twine and added a homemade vintage fabric yo yo ribbon for a bit of whimsy. A nice little country girl look I might add.


To make these easy yo yo show ribbons. You need two different sized yo yo's in coordinating fabrics, fabric button kit, lace or ribbon in a coordinating color. I used some old vintage yo yo's that I had in my stash. You can make fabric yo yo's yourself by using a yo yo maker found in craft/sewing stores, I found a package of aluminum button/fasteners in a packaged kit to make the center button...So easy just follow directions on package and use your favorite fabric...You will be addicted to these! I cut some fabric lace then sandwiched the fabric lace folded in half on the bottom then big yo yo on top, the smaller yo yo on top of the big yo yo, poking the fastener right through the middle,
 then closing the fastener closed. See pictures below.


So cute it looks like a show ribbon award. 
You can also wear it if you want...Just add a pin backing!
Have fun!!!! Enjoy!!!

Wednesday, June 24, 2015

Summertime Jam Series~ Strawberry Rhubarb Jam


Strawberry~Rhubarb Jam

Ingredients 
(makes about 6 half pints)

2 cups crushed strawberries

2 cups chopped rhubarb

1 package powder pectin

¼ cup lemon juice

5 ½ cups sugar

Directions

1. Put strawberries, rhubarb, pectin, and lemon juice in a heavy bottomed sauce pot. Bring the mixture to a boil over medium high heat. 

2. Slowly add the sugar while stirring constantly.

3. Once the sugar is dissolved, bring the solution back to a boil. Boil hard for 1 minute.

4. Remove the jam from the heat and quickly ladle into hot, sterile jars leaving ¼ inch head space. 

5. Place the lids on the jars and adjust the two piece cap until finger tip tight.

6. Process 10 minutes in a boiling water canner.

7. Remove the jam from the canner and allow to cool completely. The jam may take several days to set completely. Mine took 48 to completely set and have an actual jam texture. 


Definitely one of my favorite jams to make. I first discovered rhubarb for myself about 14 years ago while living in Washington. My neighbors had wild growing rhubarb near their house and allowed me to glean from their lot. I made many pies and jam and rhubarb sauces over the years and never tire of it. It is just so delectably yummy to the tummy.


In the Winter months this is sure to be a delightful treat, 
that will remind you of the Summer's past. Enjoy!!!

Thursday, June 18, 2015

Summertime Jam Series~ Farmer Boy Tomato Jam


~Farmer Boy Tomato Jam~
Adapted from Farmer Boy by Laura Ingalls & Little House Cookbook

SERVES: 2 PINTS
Ingredients:
  • 2 pounds ripe tomatoes
  • 1½ cups light brown sugar
  • 1 lemon, zested and juiced
  • ¼ teaspoon ground ginger 
  • 2 half-pint jars
Preparation
  1. Add the tomatoes to a blender or food processor. Pulse several times to crush the tomatoes.
  2. Transfer the tomato puree to a medium skillet set over medium heat. Stir in the brown sugar, lemon zest and juice, and ground ginger. Cook, stirring frequently, until the mixture is thick and jammy – this will take about an hour. 
  3. Ladle the jam into the jars and seal. Process in water bath canner with boiling water for 10 minutes. The jam is delicious right away, but tastes even better after a few weeks. Shelf life is good for up to one year. Once opened use within 2 months.


Oh my this one is delish! 
A perfect jam for crackers and cheese, 
on BBQ Chicken or spread out on toast. 


ENJOY!!!!

Sunday, June 7, 2015

Summertime Jam Series: Blueberry Basil Jam~


It's that time of year again for us. Our Summertime jamming sessions. Oh how I love fresh fruit jams throughout the year. I don't buy commercial jams anymore unless my cupboard is bare. I started canning 15 years ago and will continue to can for however long I can. I love it. The art of canning has made quite the comeback in the last decade...Especially with those who are health conscious or living off their land. I don't have a garden or fruit trees anymore, so all my fruit comes from local farms as much as possible. Oh the joy of...Making your own jams, and canned goods. This Summer I thought it would be fun to do a jam series and share with my readers. Every week this Summer I will share a recipe for some delicious jams. If you have never tried your hand at canning or making jam before, I want to encourage you that it is easy, inexpensive, fun and rewarding for your whole family. Oh the joy of opening up a lovely jar of  Summer fruit jam during the Winter months...The taste of Summer at your fingertips and made by you!


~Blueberry Basil Jam~


Ingredients:

10 cups whole blueberries (about 3 1/2 pounds)
4 1/2 cups granulated sugar, divided
1 package no/low sugar powdered pectin
1/2 cup fresh basil leaves, coarsely torn
1 tablespoon lemon juice
1/2 cup filtered water

Directions:

Prepare your canner and wash/sterilize 8 half-pint mason jars. Keep jars in hot (not boiling) water until ready to use.
In a small bowl, whisk together 1/4 cup of sugar and pectin. In a separate bowl, measure out remaining 4 1/4 cups of sugar and set aside.
Wash blueberries and discard stems. Place in a blender or food processor. Cover and pulse to evenly chop. Do not liquefy. Transfer into an 8-quart saucepan.
Add basil, lemon juice and water in food processor. Pulse until well blended and no large chunks of berries or basil remain. Add to saucepan.
Stir pectin mixture into blueberries, and cook over medium-high heat until mixture reaches a full boil that cannot be stirred down. Quickly stir in remaining sugar. Return to a boil, and boil for exactly 1 minute, stirring constantly. Remove from heat. Skim off any foam.
Ladle hot jam into jars, leaving 1/8-inch of head space. Wipe jar rims and threads. Screw on lids and rings. Process in a boiling water bath for 10 minutes. Remove from water and let cool completely, 12 to 24 hours. Unopened sealed jam in jars are good for one year on the shelf. Opened jars of jam should be used with one month.

This jam is so good with a delightful hint of basil....MMMMM!!! 
To die for! (not literally) I hope you will enjoy making this...So so delish! 
You won't be disappointed!
Happy Summertime Jamming Y'all!

Wednesday, December 24, 2014

Making Candy Cane Syrup & Homemade Pancake Mix


I pulled together a couple homemade gifts from my kitchen for a few friends this year. There is nothing like a sweet, thoughtful homemade gift to give to a friend. Thought I would share the recipes for an easy, inexpensive gift. Most items you would probably already have on hand in your pantry.

For Candy Cane Syrup:

Combine 2 cups of sugar and 1 cup of water to a saucepan. Stir well and cook on medium heat. Add 6-8 broken pieces of candy cane to the sugar mixture until dissolved. It will turn a nice pink color. Stir frequently. Let it come to a boil for about 2-3 minutes and turn off heat allowing the syrup to cool in the pan. Once cooled, pour into a jar with lid for storage.
****
I saved my glass maple syrup containers through the year to use for such things. Syrups are easy to make. You can make different flavors and give them to friends or family for any occasion. If you don't have a maple syrup container. A jar will do.


For Homemade Pancake Mix:

Combine dry ingredients in a large bowl.
4 cups all purpose flour
3 tablespoons baking powder
2 teaspoons baking soda
1 teaspoon salt
3 tablespoons sugar

Mix well together and store in a large mason jar. You can double this recipe to make more!
I made a card and wrote in the instructions to make them:

 Add fabric, twine, tag etc...to personalize the gift to the receiver. Use your clever quips and be creative! Have fun with it!

You can double or triple the recipe for making the pancakes here:

Add 1 cup of mix above
1 egg
1 cup of milk
1 tablespoon melted butter or oil
mix together well.

Preheat greased griddle on medium to high heat.
 pour 1/3 cup of the batter and cook until pancake bubbles on top,
 flip and cook 1-2 minutes more.


Enjoy pancakes with candy cane syrup for a nice
 Christmas breakfast treat.
Enjoy!!!!

Saturday, April 19, 2014

Homemade Lära Bars


A couple posts down I shared our new adventure. Changing our lifestyle and the way we eat. So far it is going great. However, Easter is just a day away. I got to thinking. Well, if we are cutting out all the junk and candy stuff...What could I do for Freckle's Easter basket this year. Okay time to get creative. We are not eating bread either so I had to come up with something healthy, whole, with no added refined sugars and wasn't a grain. I found just what I was looking for. Have you ever had Lara Bars? They are pretty darn good. I got the recipe on Pinterest. 


It is quite simple. 
Yet you will need a food processor for this.
Look at all the healthy yummies that go into this thing. Oh and no baking!!!! It's so simple...You just combine all the ingredients together, put it in a pan and freeze for 20 minutes, cut them into bars and enjoy. 


Recipe for Homemade Lära Bars (Mixed Berry):

  • 1 cup almonds
  • 1/2 cup pecans
  • 12 Medjool dates
  • 1 cup dried berries and / or cherries
  • 1/2 cup shredded coconut
  • 1/4 teaspoon sea salt
  • 1 Tablespoon melted coconut oil

Directions for Homemade Lära Bars:

  1. Line an 8″ x 8″ baking dish with plastic wrap or wax paper. Set aside.
  2. Add the nuts to the food processor and pulse down until they become small, crumbly bits. Don’t let it go too long or it will become nut butter—er, not that there’s anything wrong with that but it won’t help this recipe. Some pieces may be a bit bigger and some might be tiny. That’s okay. Pour the nuts in a large bowl.
  3. Now, pit the dates and put them in the food processor with the dried fruit, shredded coconut oil and sea salt. Pulse until it comes together in a ball.
  4. Now, with clean hands: add the dried fruit to the nuts and combine both together. You’ll have to knead pretty well but keep at it.
  5. Once all the nuts are blended in, you’ll take the lump of deliciousness and put it in the baking dish. Press the mixture into the dish until it’s packed down and smooth.
  6. Freeze for 20 minutes until firm.
  7. Turn out the mixture onto a cutting board and chop into pieces as big or small as you’d like. I usually make 12 bars from one dish.
  8. I individually wrap them. They can be frozen for a couple months if packed to withstand freezer burn. If not, store in the fridge for short term use


After I cut them up, I wrapped each bar and threw them in the fridge.
 Of course I will fill Freckles basket with a couple of them as well!


I also decided to dehydrate some strawberry, banana and apple chips for some
 filling in the basket and I made some apple fruit leather.
Perfect, whole and healthy, good for snacks for an Easter basket.


No chocolate bunnies here this year!
Wishing you all a blessed Easter.
Enjoy!!!!