Showing posts with label cookies. Show all posts

Thursday, September 26, 2013

Autumn Flavors...Pumpkin Chocolate Chip Cookies


Hello Autumn...
Now that Autumn is upon us we also enter the flu and cold season and cooler weather. This week, I have been quite under the weather with the flu and fever. I am still fighting the bug as I write...But wanted to pop in and share a little recipe for a nice little sweet treat to ring in the new season. My dear Freckles wanted to do a little baking, requesting her favorite cookie....This is a recipe we have had around for years. A favorite of my family indeed. A delectable, moist cookie with delightful flavor, reminiscent to the Autumn season.
I bet you can't eat just one of these yummy, muffin like cookies. She prepared the batter and got to baking. The treat was sure to lift my spirits with the wonderful flavors of pumpkin and chocolate. MMMMMM...It was perfect.


I leave you with the ingredients below. Note* mix all the wet ingredients with the sugar first...Then add the dry ingredients. Mix well...It gets thick, so a lot of the mixing will be by hand...and there is a ton of batter so be prepared to bake dozens. Drop by heaping tablespoons about an inch apart on a cookie sheet...They will bake like little muffin delights.
 In my oven, it only took 13 minutes...
so watch your time.
The cookies should be golden brown.

Enjoy dear friends.
And do take care as the weather changes.

Friday, August 30, 2013

Baking Peanut Butter Cookies


There is definitely one thing Freckles loves to do and that is baking. As a part of homemaking/kitchen skills, she is learning how to cook and bake different foods. Her favorite is cookies. After dinner, our sweet tooth's were getting the better of us...Freckles suggested baking peanut butter cookies. One thing...We didn't have all the ingredients for a typical peanut butter cookie...So we searched for one with minimal ingredients...and found one that was so easy....It's going to knock your socks off.


We have been dabbling a bit in a couple of our vintage cookbooks for recipes, which makes it fun. Things that most Gramma's would have baked in the 1930's~1940's. A good Peanut Butter Cookie would be found in a cookbook back in those days. So, I decided this would also be a great project, since we have been studying the 1940's.


And of course we used our vintage aprons and Pyrex...
We felt as if we were back in time, in a Gramma's kitchen.


The house smelled of comfort....The cookies were beautiful.
 

And they tasted delightful.
It was the perfect opportunity for a wonderful life lesson and bonding
 time between mother and daughter.
These are moments I know we will cherish together.
I love those moments.

Tuesday, April 26, 2011

Vintage Meringue Cookies....


I got out my vintage Betty Crocker Cooky Cookbook over the weekend to try my hand at some of the old recipes inside! And so glad I did! I made a meringue cookie recipe that instantly reminded me of my childhood days when I took the first nibble. My Gramma would make these. It's funny how a taste or a smell or even an item will bring you instantly back to a time. For me it reminded me of  some of the visits with my Grandparents...One specific memory was a Summer spent with them. Gramma and Grampa were in the kitchen baking cookies as they sang me a Latvian song called
Little Monkey.
nedaudz maz mērkaķis ooh ooh ooh
 which meant Little, Little Monkey, ooh ooh ooh!
It is one of my favorite memories from childhood. Which i will always hold dear.
 I should get her to sing it to me or write it down before she forgets the words.

I used my vintage enamelware double boiler I found at a yard sale a couple years back with my mom.
It does a great job for just a couple bucks!

Meringue Cookies
3 eggs
1 Cup sugar
1/4 tsp.salt 1 tsp. vanilla

Heat oven to 300 degrees. Blend egg, sugar, salt and vanilla in top of double boiler. Place over boiling water; beat with rotary beater until mixture stands in stiff peaks, scraping bottom and sides of pan occasionally with rubber scraper. ( meringue will become lumpy if you don't scrape)  Drop heaping teaspoonfuls of dough on 2 lightly greased baking sheets...Place cookies on sheet immediately; bake one sheet at a time. Bake for 12-15 minutes, or until lightly browned. Remove from sheet immediately. Makes about 3 1/2 doz. cookies.
Enjoy!!!
 
Thanks for popping in and sharing with me my childhood memory.
 Do you have any memories that remind you of something when you make food?
Have a great week!!!
Linking To:
It's A Very Cherry World
Ruby Tuesday
Happy Homemaker Monday

Thursday, March 31, 2011

Good Eats...

Hello!
Thought I'd pop in to say hello!
 Just had a delightful dinner with Mr. Darling and the kids tonight.
 I made a yummy Chicken & Broccoli Cobbler from the Quick Fixes Southern Living Cookbook...
And it was really delish. So, I had to share it with you too!
Chicken & Broccoli Cobbler
1/4 c melted butter
3 cups cubed sourdough bread
1/2 cup pre shredded Parmesan cheese
3 cups small broccoli florets
3 cups chopped cooked chicken
1/2 cup drained chopped roasted red bell pepper
1 (10oz.) Alfredo sauce
1/2 cup sour cream
2 Tbl. dry sherry
Garlic seasoning
*****
1. Preheat oven to 400 degrees. Drizzle butter over bread cubes in a large bowl: sprinkle wit cheese, and toss well. Set aside.
2. Combine broccoli and next five ingredients in a large bowl. Spoon filling into a lightly greased 2 qt. baking dish or individual baking dishes: top with bread
 cubes then season just the tops with sprinkles of garlic seasoning.
3. Bake, uncovered, at 400 degrees for 30 minutes ( 20-25 min. for individual cobblers) or until bubbly and top is toasted.
P.S I didn't add the bell peppers since it is not a fave with Mr. Darling...
And I left out the sherry...Simply because I didn't have it...It was still tasty!
*****
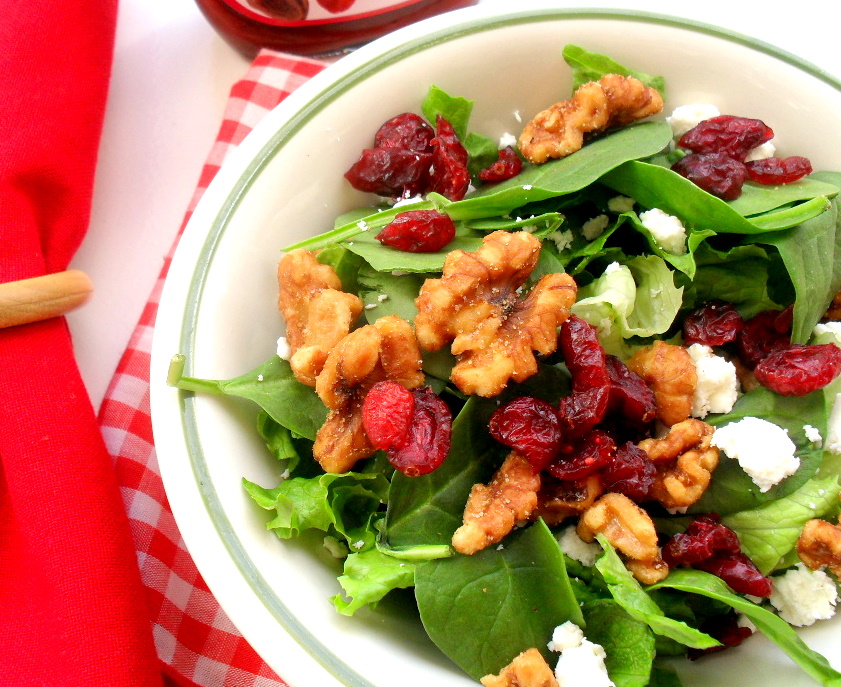
Serve this with a lovely salad. Lately I have been really into making this salad... Spinach leaves with glazed walnuts topped with feta and raspberry walnut dressing...so good!
Then you can top that all off with some homemade healthy oatmeal cookies for dessert...
Oh yeah, that's what I'm talkin' about!
Hope all is well...I am off to finish some work on a dolly I started!!!
***
Linking Up to
&

Wednesday, March 23, 2011

Mellow Yellow....


Today was just kind of one of those days...A mellow yellow day where it was sunny yet chilly out. We did our lessons, a bit of laundry, dusting, sweeping and vacuuming. My dear Freckles picked me a whole vase of cheer....Well, she made me a collage. Sweet isn't she? I ate left over black bean soup for lunch with a couple circus cookies. I found the black bean soup recipe in the Dec~Jan 2011 issue of Mary Janes Farm. There's a whole section on Soups For Supper. I already made the Tamato Tarragon Bisque and paired it with grilled cheesy sandwiches. It was delish. Next on my list is Cheddar & Potato then Butternut Squash Soup. Last week we were over a friend's for dinner...She made a really good Corn Chowder which I plan to make as well. I love soups really anytime of the year... Especially on the chilly nights. They are wholesome and MMM MMMM good for you too! Did I mention they are easy to throw together as well? Here's the recipe for Black Bean Soup. I know it looks scary in the picture, but trust me it is really tasty!

Black Bean Soup
Saute 1 diced onion, 1 cup diced carrot, 1 stalk diced celery, and 2 cloves minced garlic in 3T olive oil. Add 1 1/2  t ground cumin and 1/2 t crushed red pepper flakes; Cook for 3 minutes. Add 1 cup water, 2 cups chicken broth, and 2 cans (16oz.) organic black beans undrained; bring to a boil, then reduce heat to simmer for 10 minutes. Add 2 T fresh chopped cilantro, 1/4 t cinnamon, and 1/2 cup orange juice; cook for 10 minutes. Mash some of the beans in the pot. Stir in 2 t lemon juice and salt to taste. Serves 6.
Enjoy!
 
A bit more Spring cleaning and sorting through junk for our fundraiser garage sale is in order. Also getting ready for a visit to my mom's. The kids are going to be doing some TO DO stuff for some moola! That's always nice. Then we're off to celebrate my sisters birthday/ (SLASH) My birthday lunch for the girls and a wee bit of  shopping... Mama is gonna get us girls a little token for our birthday's! Woot!!! I am also putting out a few Springy things and thought I'd show ya this cute chubby chick I got from my mom's garage sale last Summer... Now to fill it with some goodies! Hope you all have a delightful day...Weather it be a good day or bad day or just one of those mellow yellow days...

Wednesday, December 22, 2010

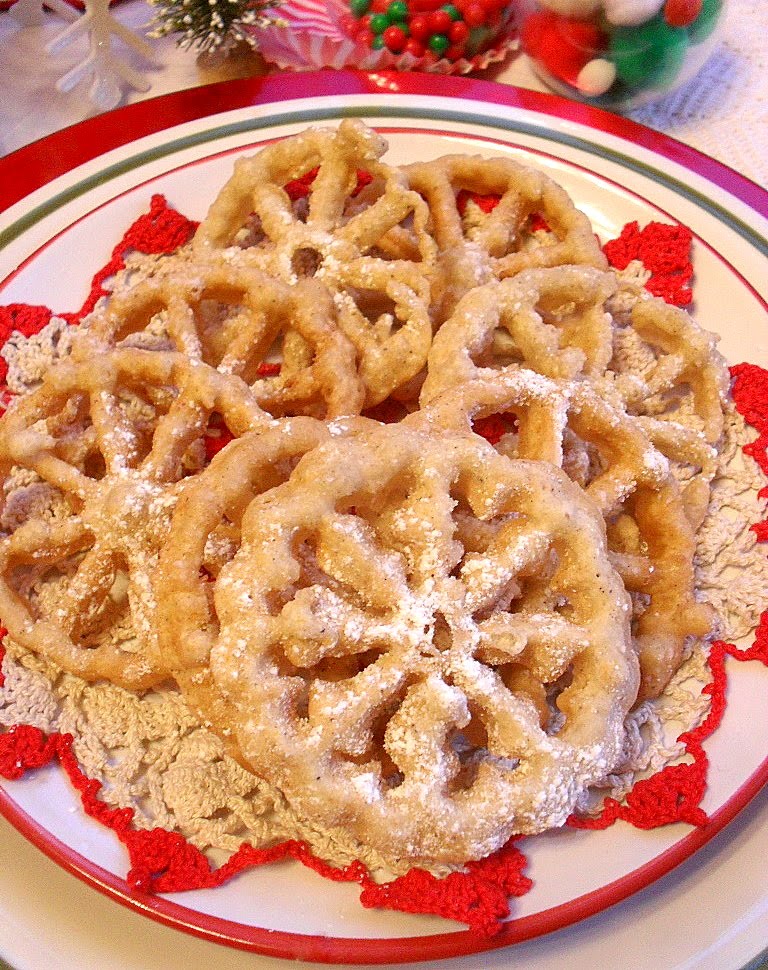
Scandinavian Rosette Cookies......


We did it!
 Our first Rosettes fresh off the deep frying pan!
And...Their beautiful!
A rosette is a thin cookie,-like deep fried  pastry of Norwegian origin.
Rosettes are traditionally made during Christmas time.
 They are made using intricately designed irons.
 The iron is heated to a very high temperature in oil, dipped into the batter,
 then re-immersed in the hot oil to create a crisp shell around the metal.
The iron is immediately removed and the rosette is separated from the iron.
 Usually, the edges of the rosette are dipped into frosting or sugar.
 Rosette recipes are popular in the United States
among families with Scandinavian ancestry.
We messed up on a few, but for the most part they all turned out wonderfully!


Scandinavian Rosette Cookies
*************
In order to use this recipe you will need the
 Rosette set found here
or anywhere on the Internet and specialty shops.
*******
2 large eggs

2 teaspoons sugar
1 teaspoon vanilla extract
1 cup milk
1 cup flour
1/4 tsp. salt
Canola oil for frying
1 cup powder sugar for dipping

Heat 3″ of oil in a deep fryer or in a large, heavy frying pan over medium-high heat to 365º. Pour dipping sugar onto a plate or sifter to sprinkle on top ( is what I did ), and set out paper towels for drying off excess grease. In a large, shallow bowl, whisk together the eggs, sugar, vanilla, and milk. Add flour and salt, whisk until batter resembles the texture of heavy cream.
First, submerge the bare rosette iron into the oil to preheat it.Carefully dip the heated rosette iron into the batter so that the batter covers the bottoms and sides of the iron but does NOT leak on to the top. ( This is very important, otherwise you will not be able to get the cookie off of the mold.) Dip the batter-covered rosette iron into the pot, completely submerging it in the oil.
Allow the rosette to fry until golden brown, using a knife edge to scrape off any excess batter formed at the top. While browning, your rosettes may voluntarily fall off of the iron into the oil. If so, simply fry them on each side for a few seconds until brown, then remove from pan with tongs. Blot excess grease with a paper towel, then immediately dip in sugar. Let cool.
If your rosettes have stuck to the iron while browning, use the knife to gently pry them away from the iron on to paper towels. Invert and cool. After the cookies have cooled, you can either store them in an airtight container or freeze them for later use.
Yield: 40 rosette cookies


Enjoy!!!!

Sunday, December 12, 2010

Baking Cookies Wearing Aprons....


Today we drove up to my Sister's house to do a day of baking for Christmas with her and my Mom & Gramma. The house was already filled with aromas of sweet goodies. We baked chocolate chip,sugar,surprise,snicker doodle,peanut butter,spritz and Russian tea cake cookies along with cherry cheese cakes, banana raisin bread, coconut somethings, fudge and rice crispy/cookie bars. Oh my Goodness there was tons...Which we split among ourselves in the end..... I may have to share with friends or else I'm gonna gain a million pounds over Christmas break.


I was so excited to give my "girls" their gifts I made especially for them this year...So we kinda did some early present exchanging. I made My Mom, Gramma and Sister each an apron to bake in., especially for this occasion...Well, at least it was a good place to start wearing them in. They seemed to love them! And that made me quite happy.


Here they are sporting their new baking wear.
 Aww they look so cute in them. Me so proud!!!!


For Gramma I chose this blue fabric with fruit on it since she loves blue and loves fruit...She also enjoys cooking and baking. The kitchen has alway's been her domain. She told me how her Gramma would always have them wear aprons during the times they cooked or baked and they would even have aprons to match their dresses. She wore the apron all day while we baked. I was so happy to see her enjoy the fruits of my labor.


For my Mama I made her a cheery apron in red... and she looked so festive in it. I knew it would make her happy since she tells me that she wants handmade gifts from me...She says they are the best! I am so glad she appreciated it....She looked very cute and spunky in it!


For my Sister I made a classic patchwork apron from vintage fabrics in all her colors...It even matched her cookware.... She wore it proudly in her kitchen. It was really a funky sort of apron but fit her personality to a T. Oh and each apron also came with a little spatula ornament!Yay! It sure made my day to see them wearing the aprons and to bake and sing Christmas songs at the top of our lungs was priceless. It really feels like Christmas time... Gramma got teary eyed today because she was so happy inside. We had a great time...Special moments and memories were made this weekend. And we left with some great treats!


Freckles and I still have some baking to do next week..
We enjoy making gingerbread men and sugar cookie cut outs .... Yum!
 Can't wait. Have a lovely day today and may you bake many memories this Christmas season.